Understanding Laser Engraving Technology
Overview of Laser Engraving – What is laser engraving and how does it work?
Laser engraving of wood is a mesmerizing blend of precision and artistry, transforming simple timber into intricate masterpieces. At its core, this technology harnesses a focused beam of light—known as a laser—to etch designs, patterns, or text onto the surface of wood with remarkable accuracy. Unlike traditional engraving methods, laser engraving offers unparalleled detail, allowing artisans and manufacturers alike to create stunning, customized pieces with ease.
The process works by directing the laser beam onto the wood, where it vaporizes or melts the surface layer, carving out the desired image. This method is not only fast but also incredibly versatile, capable of producing everything from delicate filigree to bold, deep engravings. For those exploring the realm of laser engraving of wood, understanding the inner workings of this technology opens up a world of creative possibilities—where imagination meets innovation in craftsmanship.
Types of Laser Engraving Machines – CO2 vs. Fiber lasers for wood engraving
When delving into the enchanting world of laser engraving of wood, understanding the underlying technology is essential. Two primary types of laser engraving machines dominate this craft: CO2 lasers and fiber lasers. Each offers unique advantages tailored to different artistic visions and industrial needs.
CO2 laser engravers are the most popular choice for intricate woodwork. They operate using a gas mixture of carbon dioxide, which produces a wavelength ideal for engraving organic materials like wood, acrylic, and leather. Their ability to create detailed, delicate designs makes them a favorite among artisans seeking finesse and precision. On the other hand, fiber lasers excel in marking metals and hard materials but are less commonly used for wood engraving due to their wavelength specifications.
For those passionate about laser engraving of wood, selecting the right machine hinges on understanding these distinctions.
- CO2 lasers are celebrated for their versatility and fine detail.
- Fiber lasers are more suited for industrial applications involving metal marking.
The choice ultimately shapes the creative journey—whether crafting heirloom-quality keepsakes or high-volume custom pieces. The technological nuances of each machine unlock a world of possibilities, transforming ordinary timber into extraordinary works of art.”
Advantages of Laser Engraving on Wood – Precision, durability, and customization
Laser engraving of wood unlocks a realm of artistic and functional possibilities, transforming ordinary timber into timeless keepsakes. One of the most compelling advantages of this technology is its unparalleled precision. Unlike traditional carving, laser engraving offers intricate detail that captures even the most delicate patterns with astonishing clarity. This level of finesse elevates personalized gifts, signage, and decorative pieces to a new echelon of craftsmanship.
Beyond its precision, laser engraving on wood boasts remarkable durability. The process etches into the surface at a microscopic level, creating designs that resist smudging, fading, or peeling over time. This longevity ensures that each piece retains its beauty and character, making it ideal for heirlooms or commercial products destined for a long lifespan. Moreover, laser engraving of wood allows for extensive customization—each project can be tailored precisely to the client’s vision, whether through intricate detailing or bold, minimalist statements.
For artisans and industry specialists alike, understanding the technological benefits reveals a potent tool for innovation. The ability to produce consistent, high-quality results not only streamlines workflows but also fosters creative experimentation. As the saying goes, “the only limit is imagination,” and laser engraving on wood exemplifies this perfectly—merging technology with artistry for a truly transformative craft.
Types of Wood Suitable for Laser Engraving
Hardwoods vs. Softwoods – Best choices for detailed engraving
In the realm of laser engraving of wood, the choice of timber is as vital as the artist’s brushstroke. While softwoods like pine and cedar dance effortlessly beneath the laser’s precision, their delicate fibers can sometimes blur, sacrificing intricate detail for a rustic charm. Hardwood, on the other hand, such as oak, maple, or cherry, offers a formidable canvas—capable of capturing fine, elaborate designs that stand the test of time. These woods boast denser, tighter grain structures, which translate into sharper, more durable engravings that resist wear and fading.
For those seeking unparalleled detail and longevity, hardwoods are often the preferred choice. They allow for intricate patterns, precise lettering, and a polished finish that elevates any project. Softwoods, with their more open grain, are ideal for larger, bolder designs or when a more natural, organic aesthetic is desired. Ultimately, the best choice hinges on the desired outcome—whether it’s the delicate finesse of maple or the commanding presence of walnut. When engaging in laser engraving of wood, understanding these subtle differences unlocks a world of creative potential and craftsmanship excellence.
Grain and Texture Considerations – Impact on engraving quality
The grain and texture of a piece of wood are the silent storytellers of its character, whispering tales that can be brought vividly to life through laser engraving of wood. When considering the impact on engraving quality, the natural patterns within the timber act as both canvas and challenge. Fine, tight grains—like those found in maple and cherry—provide a pristine surface that captures the laser’s precision with breathtaking clarity. Conversely, woods with more open, pronounced grains, such as oak or walnut, lend themselves to bold, textured engravings that exude rustic charm.
Texture plays a pivotal role in how the laser interacts with the surface. Smooth, even grains produce sharp, detailed designs, while rougher textures can introduce a degree of unpredictability—sometimes enhancing the organic aesthetic, other times blurring delicate lines. For those seeking intricate detail, choosing woods with a fine grain is paramount, ensuring the laser’s precision is fully realized without sacrificing clarity. On the other hand, textured woods can serve as a deliberate artistic choice—adding depth and character to each engraved piece.
Understanding these subtle differences unlocks new horizons in laser engraving of wood, transforming raw timber into enduring works of art. Whether you desire the immaculate finesse of maple or the commanding presence of walnut, grain and texture are the silent partners in creating masterpieces that stand out with both sophistication and soul.
Preparation Tips for Wood Pieces – Surface smoothing and conditioning
When selecting the ideal wood for laser engraving of wood, the intrinsic qualities of the timber become paramount. Hardwoods such as maple, cherry, and walnut are often celebrated for their fine, dense grains, which respond with remarkable clarity and precision to laser technology. These woods allow for intricate detailing, rendering high-resolution images and delicate text without sacrificing definition. Conversely, softwoods like pine or cedar, with their more open and pronounced grains, tend to produce bolder, more textured engravings—perfect for rustic or organic aesthetics.
Preparation is key to unlocking the full potential of laser engraving of wood. Ensuring a smooth, well-conditioned surface can dramatically improve the final outcome. Light sanding with fine-grit sandpaper—around 220 to 320 grit—removes roughness and raises the grain, providing a uniform canvas. For a flawless finish, a gentle wipe with a damp cloth to eliminate dust and debris is recommended. This step not only enhances laser precision but also prevents unwanted burning or charring during the process. In some cases, applying a clear coat or sealant prior to engraving can further stabilize the surface, reducing the risk of uneven burns and ensuring consistent results across different wood types.
- Start with a clean, dry piece of wood, free of knots or splinters that could interfere with the laser beam.
- Sand the surface thoroughly to achieve a smooth, even texture, paying special attention to edges and intricate details.
- Consider applying a light, even coat of wood conditioner or sealant to create a more receptive surface for laser engraving of wood.
Understanding the nuances of wood preparation, combined with the specific characteristics of each wood type, elevates laser engraving of wood from mere craft to an art form—where every detail is meticulously crafted, and each piece tells its own silent story with clarity and depth.
Designing for Laser Engraving on Wood
Creating Vector Art and Raster Images – Optimizing files for laser engraving
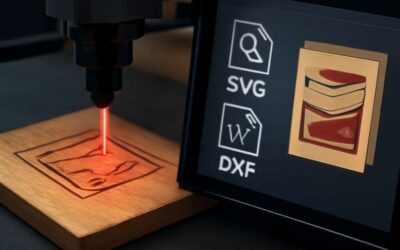
Designing for laser engraving of wood is an art that balances precision and creativity. When preparing files, understanding the distinction between vector art and raster images can unlock a world of possibilities. Vector files, composed of paths and curves, allow for clean, scalable lines that maintain clarity even at larger sizes. Raster images, on the other hand, are pixel-based and excel at capturing intricate detail and shading, adding depth to your engraved masterpiece. The key lies in optimizing these files to suit the nuances of laser engraving on wood.
To ensure your design translates flawlessly onto the wooden surface, it’s essential to consider the contrast, resolution, and line thickness. For vector artwork, simplifying complex shapes prevents laser cutting errors, while raster images benefit from high resolution—typically 300 DPI or higher—to preserve detail. When preparing your files, use dedicated software that allows you to set the appropriate engraving parameters. Sometimes, a combination of vector and raster elements in a single project can produce stunning, layered effects that truly make the design pop. Mastery of file optimization transforms mere images into timeless pieces of art through laser engraving of wood.
Design Tips for Stunning Results – Contrast, line thickness, and detail handling
In the world of laser engraving of wood, the artistry lies in the delicate dance between contrast, line thickness, and intricate detail. When designing for laser engraving on wood, these elements become the brushstrokes of your digital canvas, shaping a piece that speaks both of craftsmanship and imagination. A keen eye for contrast ensures that your engraved design stands out vividly against the natural grain, creating depth and visual intrigue.
Line thickness is equally vital—too thin, and the lines risk vanishing into the wood’s texture; too thick, and they may overpower the subtle nuances that give your piece character. Balancing these factors allows your artwork to breathe, capturing the essence of the wood’s organic beauty. For fine detail, consider using a high-resolution setting, as this preserves the crispness of intricate patterns and delicate shading. Remember, sometimes, less is more—simplifying complex shapes can prevent over-engraving errors while maintaining clarity and elegance.
To enhance the overall effect of your laser engraving of wood, experiment with varying depths and engraving speeds. A layered approach, combining bold lines with subtle shading, can transform a simple design into a mesmerizing masterpiece that highlights the natural grain while showcasing your creative vision. Ultimately, mastering these design tips elevates your work from mere images to timeless art, etched with precision and passion onto the warm canvas of wood.
Color Considerations – Using color in designs and its effect on engraving
Within the shadowed corridors of artistic craftsmanship, the choice of color in laser engraving of wood whispers secrets only the initiated can decipher. A master engraver understands that the natural hues of the wood act as a silent canvas, influencing how colors—whether bold or subtle—will emerge from the darkness. When designing for laser engraving of wood, consider the palette’s impact; light-colored woods like maple or pine will respond differently to color-infused designs than darker woods like walnut or mahogany. The contrast between the engraved areas and the untouched surface can transform a simple image into a haunting tableau, with color choices amplifying depth and mood.
For intricate work, a limited color palette often preserves clarity, avoiding the chaos of over-embellishment. Sometimes, a monochromatic scheme accentuates the natural grain, while other times, vibrant hues breathe life into the carved shadows. If you wish to add a splash of color, pinpoint areas with precision, ensuring the laser’s etching complements, rather than clashes with, the wood’s inherent beauty. Remember, the key lies in harmony—balancing the dark allure of the grain with the vibrancy of your design. When wielded masterfully, the interplay of color and wood elevates the laser engraving of wood into an art form that is both timeless and evocative.
Laser Engraving Process and Settings
Preparing the Material – Securing wood and setting up the workspace
The laser engraving process of wood is as much an art as it is a precise science. Before diving into the creative work, meticulous preparation of the material is essential to achieve crisp, clean results. Securing the wood firmly to the work surface prevents any movement that could distort the engraving, ensuring every line and detail remains sharp. A stable setup minimizes vibrations and enhances the overall quality of the laser engraving of wood.
Next, setting the right parameters on the laser engraver is crucial. Adjusting the power, speed, and frequency based on the type of wood—hardwood or softwood—can dramatically influence the final appearance. For example, softer woods require lower power settings to prevent burning, while hardwoods might need increased intensity for deeper engraving. Proper workspace lighting and ventilation also contribute to safety and precision during the process.
To streamline the process, consider these steps:
- Secure the wood with clamps or adhesive tape
- Choose appropriate laser settings for the specific wood type
- Ensure the workspace is clean, well-lit, and ventilated
By paying careful attention to these details, the laser engraving of wood can yield stunning, professional results that highlight the natural beauty of each piece. Proper preparation and setup are the foundation of every successful project, transforming ordinary wood into extraordinary art.
Adjusting Laser Settings – Power, speed, frequency for optimal results
Embarking on the laser engraving of wood is nothing short of transforming raw timber into captivating works of art. The process hinges on precisely adjusting laser settings—power, speed, and frequency—to unlock the full potential of each piece. When these parameters are finely tuned, the engraving reveals crisp lines, nuanced shading, and intricate details that elevate the natural grain of the wood.
For optimal results, consider the specific characteristics of your wood. Softwoods like pine or cedar respond beautifully to lower power settings, preventing scorching, while hardwoods such as oak or mahogany often require increased laser power to achieve deeper, more defined engravings. Adjusting the laser’s speed is equally vital—faster speeds preserve delicate details, whereas slower movements deepen the engraving.
- Set the laser power according to wood type and desired depth.
- Calibrate the speed to balance detail and burn risk.
- Modify frequency to control how the laser pulses, influencing texture and contrast.
When these settings harmonize, the laser engraving of wood becomes a seamless dance—each stroke revealing the beauty hidden within the grain, turning ordinary timber into extraordinary keepsakes. Mastering the art of laser settings adjustment unlocks a universe of creative possibilities, ensuring every project is as stunning as it is precise.
Understanding Engraving Depth and Speed – Depth control and engraving efficiency
Understanding the laser engraving process is essential for mastering the craft of transforming raw timber into stunning works of art. One of the most critical aspects is controlling the engraving depth—this determines how pronounced each line or design element becomes. A deeper cut adds drama and durability, but overdoing it can cause charring or warping, especially on softer woods.
Speed plays a pivotal role in balancing engraving efficiency with precision. Moving the laser too slowly can lead to excessive burn marks, while too fast might result in shallow, less defined details. Fine-tuning this parameter ensures each stroke preserves the natural grain and texture of the wood, revealing intricate patterns with clarity.
- Adjust the laser power to match your wood type and desired depth.
- Set the speed to prevent scorching while maintaining detail.
- Optimize the laser frequency to influence texture and contrast—higher frequencies produce smoother shading, while lower ones accentuate contrast.
When these elements harmonize, the laser engraving of wood becomes a seamless dance—each pass revealing more of the timber’s innate beauty. Mastery of depth and speed unlocks endless creative possibilities, turning simple wood into treasured keepsakes that captivate and endure.
Safety Precautions and Best Practices
Proper Equipment Handling – Laser safety gear and ventilation
Engaging in the laser engraving of wood is an art that demands not only precision but also unwavering respect for safety. The radiant beams that carve intricate designs into timber are powerful tools, capable of transforming ordinary planks into masterpieces. However, this power must be wielded with caution—safety precautions are paramount to prevent hazards and ensure a smooth creative process. Proper equipment handling is the cornerstone of this discipline, and it begins with donning high-quality laser safety gear. Protective goggles that shield your eyes from laser exposure and smoke masks that filter harmful fumes are essential companions on this journey.
Ventilation systems play a pivotal role in maintaining a safe workspace. As laser engraving of wood produces fine particulate smoke and volatile organic compounds, adequate extraction and airflow are non-negotiable. Consider installing a dedicated fume extraction unit tailored for laser operations. For added safety and efficiency, adhere to these best practices:
- Always review the manufacturer’s safety instructions before operating the laser engraver.
- Keep a fire extinguisher nearby, as sparks or overheating can ignite wood dust.
- Ensure your workspace is well-ventilated, with a clear path for air to circulate and exhaust fumes effectively.
- Regularly inspect and maintain your laser safety gear and ventilation system to prevent malfunctions.
Balancing the delicate dance between creative expression and safety measures guarantees not only stunning results in laser engraving of wood but also a secure environment where artistry can flourish without compromise. Remember, the true magic of laser engraving lies in respecting the tools and technologies that bring your visions to life!
Avoiding Common Mistakes – Overburning, charring, and uneven engraving
Laser engraving of wood is a meticulous craft that demands not only artistic flair but also a keen eye for safety. One of the most common pitfalls among novices is overburning or charring the wood, which can turn a beautiful design into a blackened mess. The secret? Fine-tuning your laser settings—lowering the power or increasing the speed—to avoid burning through the surface and creating uneven engraving. It’s a delicate dance where a slight misstep can leave you with a less-than-stunning result, or worse, a smoky disaster.
To prevent these common mistakes, always start with test runs on scrap wood. This allows you to dial in the perfect balance between depth and clarity without risking your precious piece. If you notice uneven engraving, double-check your focus and ensure your wood is properly prepared—flat, clean, and free of debris. Remember, consistency is king in laser engraving of wood, and small adjustments can make a significant difference in the final product.
When working with intricate designs, avoid rushing the process. An ordered approach—adjusting laser speed and power in small increments—helps maintain control and prevents overburning. By staying attentive and methodical, you’ll produce stunning, professional-quality engravings that showcase your mastery of laser engraving of wood, all while keeping safety at the forefront.
Maintenance of Laser Equipment – Cleaning and calibration tips
When it comes to laser engraving of wood, safety isn’t just a buzzword—it’s the backbone of every successful project. A rogue beam of laser light can turn a beautiful piece into a smoky mess faster than you can say “overburning.” To keep things on the right side of the safety spectrum, always wear appropriate laser safety gear—think goggles that would make a superhero jealous—and ensure your workspace is well-ventilated. Ventilation isn’t just about avoiding bad smells; it’s about protecting your lungs from tiny particles and fumes that can sneak into your system.
Maintenance of laser equipment is another pillar of good practice. Regular cleaning of the laser lens and mirrors prevents dust and debris from scattering the beam, which can compromise your engraving precision. Calibration is equally vital—think of it as tuning a musical instrument but for laser engraving of wood. Periodically check the focus, and ensure your machine’s settings match the type of wood you’re working on. Small, consistent adjustments—like a maestro tuning their instrument—will keep your engravings sharp and your machine happy.
For optimal performance, I recommend following a simple routine:
- Clean the laser head weekly with a soft cloth and lens cleaner.
- Calibrate the focus before each session to ensure maximum accuracy.
Remember, neglecting these steps could lead to uneven engraving, charring, or, worse, costly repairs. In the world of laser engraving of wood, a well-maintained machine and strict safety protocols are your best allies for creating stunning, professional-grade designs every time.
Creative Applications of Laser Engraved Wood
Personalized Gifts and Keepsakes – Engraved photo plaques, jewelry, and collectibles
In the realm of bespoke craftsmanship, laser engraving of wood unlocks a universe of creative possibilities. Imagine transforming a humble piece of timber into a personalized gift or a cherished keepsake—each one imbued with intricate detail and refined precision. From engraved photo plaques that preserve precious memories to jewelry that doubles as wearable art, the art of laser engraving of wood elevates both sentiment and sophistication.
People are increasingly captivated by the idea of custom collectibles—each telling a unique story. Consider the impact of a finely engraved wooden keepsake, where delicate line work and contrast can evoke emotion and nostalgia alike. Whether for commemorative gifts or artistic expressions, laser engraving of wood provides a versatile canvas for artisans and hobbyists to showcase their ingenuity.
Furthermore, the process lends itself beautifully to a variety of design styles, from minimalist monograms to elaborate motifs. This adaptability makes laser engraved wood an ideal medium for creating one-of-a-kind jewelry pieces or intricate engraved photo plaques—each a testament to craftsmanship and personal touch.
Home Decor and Art – Wall art, signs, and decorative panels
In the vibrant world of home decor and artistic expression, laser engraving of wood has become a transformative force, turning plain panels into captivating masterpieces. Imagine wall art that not only adorns a space but also tells an enchanting story through intricate patterns and personalized details. The precision of laser engraving allows artists to craft decorative panels that evoke emotion and elevate the ambiance of any room.
From custom signs that seamlessly blend functionality with artistry to ornamental wall hangings that serve as conversation starters, the possibilities are endless. The versatility of laser engraving of wood makes it possible to achieve everything from minimalist geometric motifs to elaborate, nature-inspired designs. This technique imbues each piece with a sense of craftsmanship and uniqueness, perfect for adding a touch of sophistication to modern South African homes.
- Wall art that captures the spirit of a place or a cherished memory
- Decorative panels that serve as focal points in interior design
- Engraved signs that reflect personal style or branding
Moreover, laser engraved wood offers a warm, organic texture that complements various design aesthetics. Whether you prefer the rustic charm of reclaimed timber or the sleek elegance of fine hardwoods, this method adapts effortlessly to different styles. With its ability to produce crisp lines and subtle contrasts, laser engraving of wood transforms everyday surfaces into timeless art pieces, enriching the soul of any space with beauty and meaning.
Commercial and Business Uses – Branding, awards, and packaging
In the bustling world of business branding and bespoke awards, laser engraving of wood has become the secret weapon for leaving a lasting impression—think of it as the mic drop of the craft world. This technique transforms ordinary wooden surfaces into premium marketing tools and recognition pieces that speak volumes about quality and attention to detail. Whether it’s a sleek corporate logo or an elegant trophy, laser engraving of wood ensures your message is not only seen but felt. The crisp lines and fine contrast achievable through this method elevate any item from mundane to magnificent.
For those seeking to stand out in a crowded marketplace, custom packaging offers another avenue for laser engraving of wood. Imagine luxury gift boxes or product tags with intricate designs and branding that scream sophistication—these are the subtle touches that turn a simple product into an experience. Plus, using laser engraved wood for awards and plaques adds a sense of permanence and prestige that cheap alternatives just can’t match.
- Enhanced brand visibility with customized signage
- Unique, handcrafted awards that celebrate achievement
- Elegant packaging solutions that elevate product presentation
In South Africa’s dynamic commercial landscape, laser engraving of wood offers versatile solutions that marry artistry with functionality. It’s not just about aesthetics; it’s about creating memorable, tactile connections that resonate long after the initial encounter. When precision meets creativity, the possibilities for business applications are virtually limitless—making laser engraved wood a true game-changer in branding, awards, and packaging.
Cost Considerations and Budgeting
Equipment Costs – Buy vs. lease laser engravers
When diving into laser engraving of wood, understanding the cost considerations is crucial for turning your creative vision into a profitable reality. The decision to buy or lease laser engravers significantly impacts your budget and operational flexibility. Equipment costs can be substantial, with high-quality laser engravers ranging from affordable entry-level models to premium industrial machines. For small workshops or startups, leasing might prove more economical, offering access to advanced technology without the hefty upfront investment.
Buying laser engravers offers long-term savings and ownership, but it demands a significant initial outlay. Conversely, leasing can ease cash flow and allow regular upgrades, ensuring your setup stays current with technological advancements. To navigate this landscape effectively, some entrepreneurs consider a hybrid approach—initial leasing to test the waters, followed by ownership once the business scales. This approach can optimize your budget while ensuring you have the right equipment for laser engraving of wood projects.
Material Expenses – Cost of quality wood & supplies
When exploring the realm of laser engraving of wood, budgeting becomes more than just a number—it’s the backbone of transforming craftsmanship into a sustainable business. Material expenses, particularly the cost of quality wood and supplies, can significantly influence profitability. High-grade hardwoods such as oak or walnut offer exceptional engraving results but come with a higher price tag, making it essential to balance quality with cost-effectiveness.
To keep expenses in check, many entrepreneurs opt for a strategic mix of materials, choosing softer woods like pine for prototypes while reserving premium woods for finished products. Additionally, supplies like protective coatings or special finishes can enhance the durability of engraved wood pieces but should be factored into your overall budget.
- Quality wood
- Engraving supplies
- Protective finishes
Keeping these costs transparent ensures the laser engraving of wood project remains profitable without sacrificing quality. Proper budgeting allows artisans to stay competitive, innovate with new designs, and ultimately turn their passion for laser engraving of wood into a thriving enterprise.
Operational Costs – Power, maintenance, and safety equipment
In the meticulous world of laser engraving of wood, operational costs often lurk unseen, yet they wield a surprising influence over the viability of your craft. Power consumption, maintenance, and safety equipment are the silent partners in every successful project. A laser engraver’s power setting not only determines the precision and depth of your design but also impacts your electricity bill—an often overlooked expense that can add up quickly. Regular maintenance, including cleaning lenses and calibrating mirrors, ensures your machine runs smoothly, reducing downtime and costly repairs.
Safety gear and ventilation systems are non-negotiable investments, safeguarding artisans from fumes and laser hazards. To better understand the balance, consider this simple framework:
- Power usage and its effect on energy bills
- Routine upkeep to prevent costly repairs
- Safety equipment to maintain a compliant workspace
By keeping a keen eye on these operational costs, entrepreneurs can fine-tune their budget, ensuring that every rand spent on equipment contributes to creating stunning, profitable laser engraving of wood projects. A well-managed operation not only elevates craftsmanship but also fortifies the foundation of a sustainable business venture in this artisanal niche.
Tips for Achieving Professional-Looking Results
Testing and Prototyping – Trial runs to perfect settings
Embarking on the journey of laser engraving of wood is akin to conjuring artistry from the whispering grains of timber. Yet, achieving a professional finish demands meticulous testing and prototyping—like a craftsman tuning a fine instrument. Trial runs are your secret allies, revealing how different settings influence the depth, contrast, and clarity of each design. A little patience here can transform a rough sketch into a masterpiece, ensuring your final product gleams with precision.
Consider dedicating time to experiment with the laser’s power, speed, and frequency—these variables are the alchemy behind flawless engraving. For instance, a softer wood may require gentler settings, while hardwoods demand more strength. To streamline your process, create a series of test pieces, each varying slightly in parameters. This approach unravels the subtle nuances that make or break a professional-looking result in laser engraving of wood.
- Set your initial parameters based on the type of wood and design complexity.
- Engage in trial runs on scrap pieces to observe how adjustments affect the engraving quality.
- Document the settings that yield the best contrast, depth, and crispness.
- Refine these settings with subsequent tests until perfection is achieved.
Through this iterative dance of trial and error, your laser engraving of wood can reach heights of artistry that captivate and inspire, turning simple pieces into timeless keepsakes or commercial marvels. Remember, patience in testing is the cornerstone of results that truly enchant the eye.
Layering Techniques – Adding depth and texture to engravings
Layering techniques are essential for transforming simple laser engraving of wood into a work of art. Adding depth and texture requires more than just a single pass; it’s about creating subtle variations that catch the eye. By carefully controlling the laser’s power and speed, you can build up layers that give your design a three-dimensional feel. This approach enhances contrast and makes details pop, giving your engraved piece a professional finish.
One effective method is to start with a light, shallow pass to outline your design, then gradually increase the engraving depth with additional passes. This not only improves visual interest but also prevents charring or overburning. Experimenting with different settings on scrap wood helps you understand how layering impacts the final result. Remember, patience is key—each layer adds a new dimension to your laser engraving of wood, elevating it from basic to breathtaking.
Finishing Touches – Sanding, staining, and sealing wood
Finishing touches can elevate your laser engraving of wood from mere craftsmanship to an artful masterpiece. After the intense precision of engraving, the surface often benefits from a gentle transformation—sanding, staining, and sealing—that imbues your work with a polished, professional allure. This process not only enhances visual appeal but also offers protection, ensuring your creation withstands the test of time and handling.
To achieve a flawless finish, start with fine-grit sandpaper to smooth the engraved surface, removing any residual char or rough edges. Staining can introduce rich hues that accentuate the engraved details, adding depth and warmth to your design. When sealing, select a quality clear finish or varnish; it acts as a shield against moisture and dirt, preserving the integrity of your laser engraving of wood.
For those seeking perfection, consider a layered approach:
- sand for smoothness,
- stain for contrast,
and finally, sealing for durability. Properly finished, your engraved piece becomes a testament to craftsmanship that commands admiration and respect—no detail left to chance, no surface left unrefined. Remember, the elegance of your work often hinges on these final, subtle enhancements that truly make it stand out.


0 Comments