Understanding Laser Engraving
Overview of Laser Engraving – Definition and basic principles of laser engraving
Laser engraving is often mistaken for a high-tech version of doodling on your favorite mug, but in reality, it’s a precise dance of light and matter. The basic principles of laser engraving involve using a focused beam of light—think of it as a tiny, laser-shooting artist—to etch intricate designs onto various surfaces. This process is not just about creating art; it’s a sophisticated method to produce durable, detailed markings that withstand the test of time.
Understanding how to laser engraving works begins with grasping the core concept: a laser beam is directed onto the material, where it heats and vaporizes the surface layer, revealing a clean, crisp design. The most effective laser engravers utilize controlled pulses of laser light, which can be adjusted for depth, speed, and precision. Whether you’re engraving wood, acrylic, or leather, mastering these fundamentals unlocks a world of creative possibilities—and avoids the nightmare of burnt finger paint.
For those venturing into this realm, here’s a quick overview of the key steps involved:
- Design creation using vector or raster graphics
- Setting the laser parameters—power, speed, and frequency
- Positioning the material correctly in the engraving bed
Understanding these essentials is your gateway to mastering the art of how to laser engraving, turning simple ideas into lasting impressions—literally!
Types of Laser Engraving Machines – CO2, fiber, diode, and their applications
Understanding the different types of laser engraving machines is crucial for anyone eager to master how to laser engraving. Each machine type brings its unique strengths and ideal applications, shaping the creative possibilities that lie ahead. In South Africa, where craftsmanship meets innovation, selecting the right laser engraver can transform simple ideas into durable, intricate designs.
CO2 laser engravers are perhaps the most versatile, excelling at working with non-metallic surfaces like wood, acrylic, and leather. Their ability to produce fine detail and smooth finishes makes them a popular choice for customized gifts and artistic projects. Fiber laser engravers, on the other hand, are designed to work with metals, offering exceptional precision and speed—perfect for engraving jewelry, tools, or industrial parts. Meanwhile, diode laser systems are compact and cost-effective, making them accessible for small businesses or hobbyists eager to explore how to laser engraving without a hefty investment.
Each type of laser engraving machine plays a pivotal role in different industries. For example,
- CO2 lasers
- fiber lasers
- diode lasers
all have their unique applications, yet the core principles of laser engraving remain consistent across these platforms. Choosing the right machine depends on your material needs, desired detail, and production volume, but understanding these distinctions is essential for unlocking the full potential of how to laser engraving in your projects.
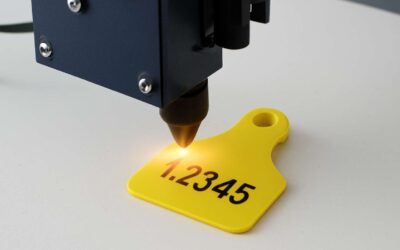
Materials Suitable for Laser Engraving – Wood, acrylic, glass, metal, leather, and more
In the shadowed realm of craftsmanship, understanding the very essence of materials is pivotal to mastering how to laser engraving. Each surface whispers secrets—wood’s warm grain, acrylic’s glossy veneer, or glass’s fragile transparency—waiting to be etched with precision. The dark allure of laser engraving lies in its ability to transform these raw elements into enduring art, capturing fleeting moments in time.
Choosing the right material is not merely a technical decision; it is an act of communion with the material’s soul. For those venturing into the depths of laser engraving, familiarizing oneself with the unique qualities of each medium is essential. For example, wood responds beautifully to the gentle burn of a laser, revealing intricate patterns and textures. Acrylic, with its smooth surface, allows for crisp, vivid designs that seem to glow from within. Metal, often the hardest challenge, demands a high-powered fiber laser system to carve out detailed, permanent marks. Leather, with its supple surface, welcomes both delicate etching and bold branding, adding a touch of timeless elegance.
- Wood: Warm, natural, ideal for personalized gifts
- Acrylic: Clear, vibrant, perfect for signs and artistic pieces
- Glass: Fragile yet striking, best for delicate engravings
- Metal: Durable, suitable for industrial and jewelry applications
- Leather: Luxurious, lends itself to custom accessories and décor
Each material demands a different approach, a unique set of parameters in the quest of how to laser engraving. The interplay between laser power, speed, and focus must be meticulously calibrated to harness the full potential of each substrate. This nuanced dance with the materials transforms simple objects into hauntingly beautiful artifacts, echoing the dark poetry of craftsmanship itself.
Preparing for Laser Engraving
Selecting the Right Laser Engraving Machine – Factors to consider based on project needs
Choosing the right laser engraving machine is a pivotal step in mastering how to laser engraving with precision and efficiency. The decision hinges on understanding your project’s specific needs—whether you aim to craft intricate jewelry designs or etch durable signage. A machine that aligns with your material choices and expected output can transform your creative process from cumbersome to seamless.
Several key factors influence this decision. Power output, engraving speed, and the working area are vital considerations that shape your workflow. For example, if you’re working with delicate materials like leather or acrylic, a lower wattage diode laser may suffice. Conversely, larger projects involving metal might demand the robustness of a fiber laser.
It’s also worth evaluating the machine’s software compatibility, precision, and ease of maintenance. These elements ensure you can consistently produce high-quality results while minimizing downtime. Remember, selecting the right laser engraving machine is not just about technical specs but about how well it integrates into your creative vision and business goals. When you understand these factors, learning how to laser engraving becomes a much more rewarding journey.
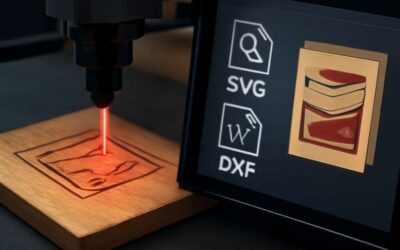
Designing Your Artwork – Using design software like CorelDRAW, Adobe Illustrator, or Inkscape
Embarking on the journey of how to laser engraving transforms mere ideas into intricate masterpieces, much like forging a mythic sword from raw steel. Before diving into the depths of your chosen material, preparing your artwork with precision and clarity is essential. The right design software acts as your enchanted palette—CorelDRAW, Adobe Illustrator, and Inkscape are among the most revered tools by artisans eager to craft detailed, captivating images. These programs allow for meticulous control over lines, shading, and vector paths, ensuring each detail breathes life into your creation.
To optimize your workflow, consider establishing the resolution and size of your design early on. This ensures your laser engraving project aligns perfectly with your material dimensions and desired output quality. When using design software, it’s often helpful to create a layered file—each element can be adjusted independently, giving you the flexibility to refine your work before the actual engraving process begins. Remember, a well-prepared digital file is the secret to unlocking flawless results in your laser engraving endeavors.
For a seamless transition from design to reality, double-check your artwork for any overlaps or unintended gaps. This step prevents surprises during the engraving session and ensures your finished piece matches your artistic intent. Whether you’re etching a delicate jewelry motif or a bold signage design, mastering how to laser engraving starts with designing artwork that is as precise and enchanting as the story you wish to tell through your craftsmanship.
Material Preparation – Cleaning, securing, and positioning materials for optimal results
Mastering how to laser engraving begins long before the laser fires. Material preparation is the silent hero behind flawless results, often overlooked but crucial for professional craftsmanship. Before you start, ensure your surface is pristine—clean, free of dust, oils, or fingerprints. A simple wipe with alcohol or a gentle cleaner can make a significant difference by eliminating contaminants that could distort the engraving. Securing your material firmly in place is equally vital; movement during the process can blur intricate designs or cause misalignment. Use clamps, tape, or specialized fixtures to stabilize the piece and prevent any shifts.
Positioning your material correctly within the laser bed is essential to maximize precision and avoid waste. For complex projects, consider creating a dedicated jig or template—this not only speeds up workflow but guarantees consistency across multiple pieces. When preparing for laser engraving, remember that the smallest details matter. Proper preparation transforms your digital design into a stunning physical masterpiece, revealing the true potential of your laser engraver while ensuring each project is executed with finesse and accuracy.
Laser Engraving Process
Setting Up the Laser Engraver – Machine calibration, focusing laser, and safety precautions
Mastering the intricacies of how to laser engraving begins with meticulous setup—an often overlooked yet vital phase that can transform a good project into a masterpiece. The laser engraver, a tool of both precision and power, demands careful calibration to ensure the laser beam is perfectly focused and aligned. This calibration is not merely a routine; it’s the foundation upon which every subsequent detail rests. When the laser is focused correctly, the engraving process becomes more efficient, with sharper, cleaner results that showcase the depth of your craftsmanship.
Equally important are safety precautions that safeguard the operator and preserve the integrity of the material. Before initiating any engraving session, it’s crucial to wear appropriate protective gear—goggles that filter the specific wavelength of your laser—and to ensure proper ventilation. Additionally, regularly inspecting the laser head for dust or debris prevents misfiring and prolongs the machine’s lifespan. Remember, understanding how to laser engraving involves more than just design; it’s about setting up your equipment with precision and care to unlock its full potential.
Configuring Parameters – Adjusting power, speed, resolution, and DPI
Understanding how to laser engraving involves more than just uploading a design and pressing start. Adjusting the parameters such as power, speed, resolution, and DPI is crucial to achieving the perfect result. These settings influence how deeply and sharply the laser interacts with the material, ultimately defining the clarity and durability of your engraving.
For intricate work, increasing the resolution or DPI allows for finer detail, but it also requires a delicate balance with laser power and speed to avoid burn marks or uneven engraving. Conversely, lowering the power and increasing the speed can produce a more subtle mark on softer materials. It’s a process of experimentation, honing in on the ideal combination for each specific project.
In practice, many artisans and hobbyists use a simple ordered list to refine their process:
- Start with a baseline setting recommended for your material and machine.
- Gradually adjust the laser power to find the minimum effective level that produces a clean mark.
- Modify the speed to control how long the laser stays on the surface, affecting depth and contrast.
- Fine-tune the resolution or DPI to enhance detail without sacrificing efficiency.
Mastering these configuration parameters unlocks the full potential of your laser engraver, transforming raw materials into works of art with precision and care. Whether engraving on wood, acrylic, or metal, understanding how to laser engraving ensures your projects come out just right—sharp, detailed, and beautifully finished every time.
Running Test Engraving – Importance of test runs and adjusting settings
In the shadowed silence of your workshop, the true artistry of laser engraving reveals itself—not in the initial press of a button, but through meticulous testing and adjustment. Running test engravings is the silent ritual that transforms raw potential into perfection. Each test run is a voyage into the unknown, a chance to unveil how your chosen settings dance with the material’s soul.
Understanding how to laser engraving means embracing the importance of these preliminary trials. A single test can expose hidden flaws—burn marks, uneven lines, or insufficient contrast—that might otherwise mar the final masterpiece. Adjusting parameters such as laser power, speed, and DPI based on test results ensures the engraving’s depth and clarity are just right. To streamline this process, many artisans follow a simple sequence:
- Run a baseline test on a scrap piece of the same material.
- Gradually increase or decrease laser power to find that delicate threshold where detail emerges without scorching.
- Adjust the speed to control how the laser interacts with the surface—slower for deeper marks, faster for subtler effects.
- Fine-tune the resolution or DPI to capture intricate details while maintaining efficiency.
Through this iterative dance of trial and error, the engraver becomes a master of their craft, forging clarity from chaos. Every test engraving offers a glimpse into the mysterious alchemy of how to laser engraving, revealing the perfect harmony between machine settings and the material’s essence. Such deliberate experimentation is not mere preparation—it is the gateway to creating engravings that are both hauntingly beautiful and precisely crafted, every single time.
Post-Engraving Steps
Cleaning and Finishing – Removing debris, polishing, and sealing engraved surfaces
Once the laser has done its silent, precise work, the real magic begins—post-engraving cleaning and finishing. This phase is crucial to ensure your masterpiece shines with clarity and durability. Debris, tiny charred particles, and residue can obscure fine details, so removing these is not just aesthetic but essential for longevity.
Gently brushing or using compressed air helps dislodge stubborn debris from intricate carvings. For a more polished look, a soft cloth or specialized polishing pads can be employed to bring out the surface’s luster. When working with metals or glass, sealing the engraved surface with a protective coating can prevent tarnishing or fading over time, extending the life of your work.
- Clean the surface with a suitable solvent or cleaner based on material type.
- Use a soft cloth or brush to remove any remaining debris.
- Apply a sealant or protective finish if necessary.
Understanding how to laser engraving doesn’t end with the initial pass—finishing touches are what elevate your project from good to exceptional. Each step in cleaning and finishing enhances contrast, protects details, and ensures your engraving remains stunning for years to come.
Troubleshooting Common Issues – Fading, burning, or uneven engraving
Post-engraving issues can be frustrating, especially when you’ve invested time and precision into your project. Fading, burning, or uneven engraving are common problems that often stem from settings or material inconsistencies. Understanding how to laser engraving properly involves troubleshooting these issues to achieve consistent, professional results.
Fading typically occurs when the laser power is too low or the engraving speed is too high. Adjusting these parameters ensures deeper, more vibrant marks. For uneven engraving, check your machine’s focus and focus consistency. If the laser isn’t perfectly aligned, some areas may appear lighter or more burnt than others.
Burning edges or excessive charring can be mitigated by reducing power or increasing speed. Sometimes, the material itself can cause irregularities—uneven surfaces or inconsistent density affect how the laser interacts. In such cases, testing on scrap pieces helps refine your settings before starting the main project.
To help you better, here’s a quick overview of common issues and solutions:
- Fading: Increase laser power or decrease engraving speed.
- Burning: Reduce power or increase speed, and ensure proper focus.
- Uneven engraving: Check focus calibration and material consistency.
Mastering how to laser engraving involves patience and trial, but once you understand these troubleshooting steps, your engravings will turn out sharp and uniform every time!
Maintenance of Laser Machines – Regular cleaning, parts check, and safety checks
After each intricate session of laser engraving, the machine’s silent hum should give way to meticulous maintenance—an act often overlooked but vital in preserving precision and longevity. Regular cleaning of the laser bed and lens isn’t merely routine; it’s a ritual that ensures your engraver’s vision remains crystal clear. Tiny particles from burnt material can obscure the laser’s focus, dulling the brilliance of future projects. A gentle wipe with a soft cloth and appropriate cleaning solution keeps this optical core pristine.
Equally important is a thorough check of parts—mirrors, belts, and nozzles—each a vital cog in the intricate dance of laser precision. Tightening loose components and replacing worn-out parts prevents misalignments, which can cause uneven engraving or fading. Don’t forget safety checks, especially inspecting emergency stops and ventilation, to ensure your workspace remains secure and compliant with safety standards. When you understand how to laser engraving, maintaining your equipment becomes an extension of your craft—an act of devotion to enduring quality and flawless artistry.
Advanced Laser Engraving Tips
Creating Complex Designs – Layering and multi-pass techniques
Mastering advanced laser engraving techniques transforms simple designs into intricate works of art. Layering and multi-pass methods allow artisans to build depth and richness, elevating their craftsmanship beyond basic engraving. When exploring how to laser engraving, understanding these nuanced approaches unlocks a universe of creative possibilities. Each pass of the laser adds a new layer of detail, creating textured effects that captivate the eye and invite closer inspection.
To achieve such complexity, it’s essential to plan your design meticulously. Consider dividing your artwork into multiple layers and adjusting the laser’s power and speed for each pass. For instance, start with a light pass to outline the design, then gradually increase intensity to deepen the engravings. This technique ensures precision while avoiding burning or warping of delicate materials. Patience and experimentation are your allies in perfecting multi-pass engravings—each project becomes a testament to skill and vision.
For those eager to push boundaries, experimenting with layering effects can produce stunning visual contrasts. Incorporate different textures or colors by varying the engraving depth or using contrasting materials. Remember, mastering how to laser engraving with these advanced tips turns a simple machine into a tool of artistic expression—transforming raw material into a story told through light and shadow.
Engraving on Challenging Materials – Metal, glass, and reflective surfaces
Venturing into the realm of laser engraving on challenging materials like metal, glass, or reflective surfaces is akin to mastering a fine art—one that demands finesse, patience, and a dash of scientific curiosity. Unlike more forgiving substrates such as wood or acrylic, these surfaces often reflect or absorb laser energy unpredictably, making each project a delicate dance of precision and adjustment. Understanding how to laser engraving on such difficult materials requires a nuanced approach that balances power, speed, and focus to avoid unwanted burn marks or warping.
For metal surfaces, the key lies in pre-treatment—using specialized marking compounds or choosing fiber lasers designed for metal engraving. Glass, on the other hand, responds beautifully to lower power settings combined with multi-pass techniques, gently etching without shattering. Reflective surfaces, which notoriously challenge even seasoned engravers, benefit from meticulous calibration of laser focus and beam stability. A simple step-by-step method involves gradually increasing the laser’s power and decreasing engraving speed, ensuring each pass deepens the design without compromising the integrity of the material.
- Begin with test runs to gauge how the material reacts under different laser settings.
- Adjust parameters incrementally, observing the effects on the surface’s texture and clarity.
- Utilize masking or protective coatings when necessary to achieve cleaner results and easier cleanup.
In essence, mastering how to laser engraving on such difficult materials is less about brute force and more about finesse—an intricate balance that transforms even the most stubborn surfaces into canvases of luminous artistry. With patience and experimentation, the results can be nothing short of spectacular, turning everyday objects into bespoke masterpieces that captivate and endure.
Optimizing Efficiency and Quality – Batch processing, vector vs. raster engraving
In the intricate dance of laser engraving, efficiency and quality are often seen as competing pursuits—yet, with refined techniques, they become harmonious partners. An often overlooked aspect of mastering how to laser engraving is the strategic use of batch processing, which transforms repetitive tasks into a symphony of precision and speed. By organizing multiple items into a single operational run, you not only save time but also ensure consistency across your projects, turning a simple process into a well-oiled craft.
When it comes to engraving complex designs, understanding the distinction between vector and raster engraving is paramount. Vector engraving excels in crisp, clean lines and sharp edges—ideal for logos, text, and detailed line art—while raster engraving provides nuanced shading and depth, perfect for photographic images. Balancing these approaches can elevate your work to a new echelon of sophistication. For instance, a mixed technique where vector outlines frame a raster-etched background can produce stunning visual effects that captivate the eye.
Optimizing efficiency in laser engraving also involves technical nuances such as adjusting laser parameters with precision. Increasing the laser’s power or decreasing the engraving speed can deepen the cut or etch, but overdoing it risks compromising the material’s integrity. Hence, iterative test runs are essential, especially when working with unfamiliar substrates or intricate designs. Such meticulous calibration ensures every pass contributes meaningfully without unnecessary wastage of time or resources.


0 Comments