
Understanding Laser Engraving on Wood Grain
What Is Laser Engraving?
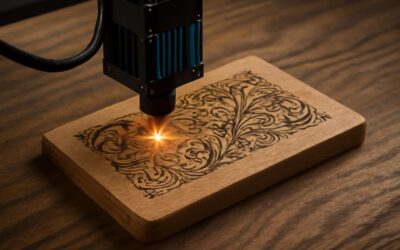
Imagine transforming a simple piece of timber into a work of art — that’s the magic of laser engraving wood grain. This innovative process harnesses the precision of laser technology to carve intricate designs directly onto wooden surfaces, revealing natural patterns that add depth and character. The beauty of laser engraving wood grain lies in its ability to accentuate the unique textures of each piece, making every item truly one of a kind.
At its core, laser engraving involves directing a focused beam of light to etch into the wood, creating permanent marks that are both crisp and detailed. This method allows for effortless reproduction of detailed artwork, text, or logos, all while preserving the organic beauty of the wood’s natural grain. Whether for personalised gifts or decorative panels, understanding how laser engraving interacts with different types of wood grain can unlock a world of creative possibilities.
How Laser Engraving Interacts with Wood Surface
Understanding laser engraving on wood grain is essential for achieving stunning, detailed results that highlight the natural beauty of timber. The interaction between the laser beam and wood surface is a delicate dance — a precise balance of heat and movement that etches intricate patterns without compromising the integrity of the material. Each type of wood grain responds uniquely; some reveal subtle textures, while others produce bold, dramatic contrasts that captivate the eye.
When laser engraving wood grain, the laser beam’s interaction depends heavily on the surface’s texture and density. Softer woods like pine or cedar tend to burn more easily, creating a darker, more pronounced mark. Conversely, hardwoods such as oak or walnut require higher precision to prevent charring while still revealing the natural grain’s depth. To optimise results, it’s helpful to understand the specific characteristics of the wood’s surface, including grain direction and density variations.
Incorporating a strategic approach, many artisans utilise laser engraving wood grain to accentuate the organic patterns, making each engraved piece uniquely captivating. For instance, a detailed understanding of how the laser interacts with different wood textures enables the creation of both subtle etchings and bold, eye-catching designs. This nuanced interaction is what elevates laser engraving from mere decoration to an art form that celebrates the inherent character of natural wood.
The Importance of Wood Grain in Laser Engraving
Understanding laser engraving wood grain is like unlocking a secret language that transforms plain timber into a tapestry of natural artistry. The grain’s unique patterns dictate how the laser interacts with the surface, making each project a one-of-a-kind masterpiece. It’s fascinating how the direction and density of the grain influence the depth and clarity of the engraving—almost like a dance where precision and finesse take centre stage.
For those venturing into laser engraving wood grain, recognising the subtle nuances can make all the difference. Softer woods, such as pine or cedar, respond with ease, allowing the laser to carve darker, more pronounced markings. Hardwoods, like oak or walnut, demand a delicate touch to prevent charring while still capturing the intricate grain details. Embracing these differences can elevate a simple design into a stunning showcase of natural beauty.
In essence, appreciating the importance of wood grain in laser engraving isn’t just about aesthetics; it’s about harnessing nature’s own blueprint to craft visually captivating pieces. Whether accentuating subtle textures or bold contrasts, the interaction between laser and wood grain is what turns a basic material into a work of art. After all, the true magic lies in how these organic patterns breathe life into every engraved creation.
Types of Wood Suitable for Laser Engraving
Hardwoods vs Softwoods
Choosing the right type of wood for laser engraving wood grain can dramatically influence the final aesthetic and durability of your project. Hardwoods, with their dense, fine grains, tend to produce sharp, detailed engravings that reveal intricate patterns, making them a favourite among artisans seeking precision. Conversely, softwoods like pine or cedar often have more prominent, open grain structures, which can lend a rustic charm but require careful laser settings to prevent burn-through or uneven engraving.
Hardwoods such as maple, cherry, and walnut are renowned for their smooth, consistent grain that responds beautifully to laser engraving wood grain, displaying crisp lines and rich contrast. Softwoods, however, may be better suited for more organic, textured effects, adding character and warmth to the finished piece. When selecting wood, consider the density and grain pattern — these factors play a pivotal role in how the laser interacts with the surface and ultimately impacts the visual appeal of your engraved design.
Popular Wood Types for Engraving
Among the myriad of woods that whisper their secrets to the laser, certain types stand out as enchanting canvases for laser engraving wood grain. These woods, celebrated for their beauty and character, transform simple projects into works of art. Maple, with its smooth, pale surface, offers a pristine backdrop where intricate laser engraving wood grain reveals crisp, contrasting details that seem almost alive. Cherry, renowned for its warm, rich hues, responds with a subtle sheen that enhances every engraved line, making each piece a testament to craftsmanship.
For those seeking a touch of rustic charm, softwoods like cedar and pine can be truly captivating. Their pronounced, open grain patterns lend a textured, organic feel to the engraved design, adding depth and warmth. When selecting wood types for laser engraving, consider not only the aesthetic appeal but also the grain’s responsiveness to laser settings. An understanding of these popular wood types for engraving ensures that each project captures the perfect harmony of form and function, elevating the art of laser engraving wood grain to new heights.
Factors Determining Wood Suitability
Choosing the right wood for laser engraving wood grain is an act of discerning artistry—an unspoken dialogue between material and maker. The suitability of wood hinges on a complex interplay of factors that influence the final outcome, from the density of the grain to its moisture content. Dense hardwoods like oak and walnut possess a robustness that can yield intricate, sharply defined laser engraving wood grain, but require precise calibration to avoid burning or scorching. In contrast, softer woods such as cedar and pine offer a more forgiving canvas, with open grain patterns that lend a textured, organic quality to the laser-engraved design.
To truly understand the potential of a piece of wood, one must consider its natural characteristics, which include:
- Grain tightness and clarity
- Surface smoothness
- Moisture levels
- Resin and sap content
Each element plays a critical role in how the laser interacts with the wood surface, ultimately shaping the beauty and durability of the finished project. When selecting materials, it’s not merely about aesthetics—it’s about respecting the silent language of the wood and unlocking the full potential of laser engraving wood grain.
Preparing the Wood Surface for Engraving
Cleaning and Sanding the Wood
Before the laser can unveil its intricate artistry on wood grain, the surface must be meticulously prepared. A clean, smooth surface acts as the canvas where light meets texture, ensuring precision and clarity in the final engraving. Any debris or residual oils can distort the laser’s path, leading to uneven results. That’s why thorough cleaning is non-negotiable—use a soft cloth dampened with a gentle cleaner to remove dust and grease without leaving streaks.
Sanding the wood is equally vital, but it’s a delicate dance. The goal isn’t to remove character but to create an ideal surface that highlights the natural beauty of the wood grain. A fine-grit sandpaper—around 220 grit—can gently smooth out imperfections and raise the grain for a more uniform appearance. Once sanded, a quick wipe-down with a tack cloth will eliminate any lingering particles, revealing a pristine surface ready for laser engraving. When done right, this preparation turns ordinary wood into a striking showcase of laser-engraved artistry, where every detail of the wood grain is accentuated with stunning precision.
Choosing the Right Wood Finish
When it comes to laser engraving wood grain, choosing the right wood finish can make all the difference between a masterpiece and just a muddled mess. A poorly prepared surface is like trying to paint on a greasy window—certain to cause frustration and uneven results. The key is in selecting a finish that enhances the wood’s natural beauty without obscuring the intricate patterns of the grain.
Opt for finishes that are compatible with laser engraving wood grain, such as natural oils or light sealants, which can bring out the depth and character of the wood. These finishes act as a protective layer, preventing the laser from bouncing off or smudging the surface, thus ensuring crisp, clean lines. Remember, a matte or semi-matte finish often works better than gloss, as it reduces glare and allows the laser to achieve finer detail.
To streamline the process, consider using a simple
- unscented wood sealant
- light sanding
- and a tack cloth
—these small steps can elevate your laser engraving wood grain from amateurish to artful. The right finish isn’t just about protection; it’s about creating the perfect stage where the laser can perform its magic, revealing the subtle nuances of the wood’s natural pattern with stunning clarity.
Importance of Grain Orientation
Getting the most out of laser engraving wood grain starts long before the laser fires. Proper preparation of the wood surface is crucial, especially considering the importance of grain orientation. Interestingly, the direction of the grain can dramatically influence the clarity and depth of the engraved pattern. Engraving along the grain often results in sharper lines and more uniform shading, while across the grain can cause uneven burning or blurred details.
To optimise laser engraving wood grain, it’s essential to examine the natural flow of the wood’s pattern. Carefully aligning your design with the grain can make a significant difference, accentuating the intricate details that make each piece unique. Sometimes, simply turning the wood or adjusting the design orientation can turn a mediocre result into a work of art. Remember, the subtle nuances of the wood’s natural pattern are what truly bring a laser engraving to life.
Techniques for Laser Engraving Wood Grain
Setting Optimal Laser Parameters
Mastering the art of laser engraving wood grain demands a nuanced approach that balances precision with creativity. The subtle interplay between laser power, speed, and frequency can transform a plain piece of wood into a textured masterpiece. An often-overlooked aspect is the importance of setting optimal laser parameters—these are the invisible hands shaping the final aesthetic. When executed correctly, your engravings can highlight the intricate patterns of the wood grain, revealing a depth that’s almost tactile.
To achieve this, I recommend an iterative process — adjusting laser power and speed in small increments until the desired depth and contrast are attained. A key technique involves modifying the laser’s pulse frequency; lower frequencies tend to produce darker, richer engravings that mimic natural wood textures beautifully. Sometimes, a combination of fine-tuning these settings results in a striking balance that accentuates the wood grain’s natural character without overburning or losing detail.
Remember, every wood type responds differently. For example, softer woods may require reduced laser power to prevent burn marks, while harder woods might need increased settings to carve out the detailed grain patterns effectively. Experimentation is essential — a systematic approach involving
- adjusting laser speed
- modulating laser power
- varying pulse frequency
can unlock the full potential of laser engraving wood grain. The secret lies in understanding how these parameters interact, turning a straightforward engraving into a captivating visual story etched in time.
Controlling Depth and Contrast
Controlling depth and contrast in laser engraving wood grain is both an art and a science. Achieving the perfect interplay between these elements allows the natural beauty of the wood to shine through, transforming an ordinary surface into a textured work of art. A subtle increase in laser power can deepen the engraving, revealing more intricate details of the grain pattern, while adjusting speed determines how light or dark the final result appears.
One highly effective technique involves modulating the pulse frequency; lower pulse frequencies tend to produce richer, darker engravings that mimic the organic intricacies of wood grain. Sometimes, a combination of slight adjustments in laser power, speed, and frequency results in a stunning contrast that accentuates the natural character of the wood without overburning. It’s a delicate dance—each setting influencing the other, demanding patience and a keen eye.
When working with different types of wood, understanding how the grain responds to laser engraving wood grain is essential. Softer woods may require reduced laser power to prevent burn marks, whereas harder woods often need increased settings to carve out detailed patterns effectively. Experimentation with these parameters—especially controlling depth and contrast—can unlock a host of creative possibilities, turning simple wooden surfaces into captivating visual stories.
Working with Grain Direction for Effect
Mastering the dance with the grain is where true artistry in laser engraving wood grain reveals its haunting beauty. The direction of the wood’s natural fibres can transform a simple pattern into a tapestry of shadow and light—each stroke echoing the ghostly whispers of the tree’s history. When working with grain direction for effect, the key lies in aligning the laser’s movement with the wood’s inherent flow, accentuating the organic intricacies that make each piece unique.
By carefully choosing whether to engrave along or against the grain, one can evoke vastly different moods—either a smooth, flowing texture or a jagged, dramatic contrast. Sometimes, reversing the laser’s path to cut against the grain unveils a spectral chiaroscuro, revealing depths unseen. For added drama, consider employing a combination of techniques, such as
- engraving along the grain for a subtle, natural effect
- and then switching to against the grain for striking contrast
to craft a visual narrative as dark and mysterious as the woods themselves.
In the shadows of these choices, the subtleties of grain direction wield silent power—each decision shaping the story etched into the wood’s very soul. It is here, amid the interplay of light, shadow, and the fibre’s ancient whispers, that the true essence of laser engraving wood grain comes alive—an art as old as the forest, reborn through modern precision.
Design Tips for Engraving Wood Grain
Creating Depth and Texture
When it comes to laser engraving wood grain, creating a sense of depth and texture transforms a simple design into a tactile masterpiece. The secret lies in understanding how light interacts with the grain’s natural ridges and valleys, allowing the engraver to craft intricate illusions of three-dimensionality. Subtle variations in laser power and speed can accentuate these natural patterns, making the engraved design seem to leap from the surface. This technique breathes life into the wood, revealing its organic beauty in a way that feels both authentic and captivating.
To enhance the realism of laser engraving wood grain, consider working with the direction of the grain itself. Aligning your design along the natural flow can produce a more harmonious and believable texture. Additionally, employing a combination of shallow etches for soft shading and deeper engravings for pronounced features helps create an interplay of contrast and shadow. This layered approach adds richness and visual interest, ensuring each piece tells a story of craftsmanship and nature’s artistry.
Enhancing Natural Grain Patterns
Enhancing natural grain patterns during laser engraving wood grain is akin to revealing a hidden story etched by centuries of growth. The interplay of light and shadow can transform a simple piece of wood into a captivating work of art, capturing the organic flow of the grain with subtle finesse. When designing for laser engraving wood grain, it’s crucial to respect the natural direction of the grain itself—aligning your design along its flow can evoke a sense of harmony that feels almost instinctive.
To achieve a more authentic and textured appearance, consider employing variations in laser power and speed. Gentle, shallow etches can mimic soft shading, while deeper engravings create striking contrasts and pronounced features. An effective way to enhance realism is to experiment with layering these techniques, which adds depth and complexity to the finished piece. The goal is to make the engraved pattern appear as a natural extension of the wood’s inherent beauty, inviting viewers to explore its tactile richness.
- Observe the grain’s natural flow, and plan your design to follow its path for a more cohesive effect.
- Use contrasting depths in your engravings to mimic the organic valleys and ridges of the wood’s surface.
- Adjust laser parameters to create subtle variations, enhancing the illusion of depth and texture.
By thoughtfully working with the grain direction and leveraging layered engraving techniques, craftsmen can elevate their projects, making each piece a testament to the hidden complexity within every wooden surface. Laser engraving wood grain becomes not just a process, but an art form—an intimate dance between technology and nature’s artistry.
Combining Colors and Effects
When it comes to laser engraving wood grain, the artistry lies in the delicate balance of colours and effects that breathe life into each piece. Combining subtle hues with varying depths can elevate a simple design into a compelling narrative etched onto natural beauty. The real magic happens when you subtly layer different engraving techniques—soft shading alongside bold contrasts—to mimic the intricate valleys and ridges of the wood’s surface. This technique not only enhances realism but also invites viewers to explore the tactile richness of the material.
To achieve a harmonious blend of colours and effects, consider experimenting with a combination of laser settings. For instance, gentle, shallow engraves in lighter tones can evoke softness, while deeper, more pronounced markings add dramatic contrast. A thoughtful interplay of these elements can transform an ordinary engraved piece into a visual symphony, capturing both the organic flow of the wood grain and the artist’s unique vision.
- Adjust laser power to control shading intensity, creating a layered, three-dimensional effect.
- Employ varied engraving speeds to influence depth and texture, enhancing visual complexity.
- Incorporate colour accents or coloured finishes post-engraving to heighten the aesthetic appeal.
By skilfully combining colours and effects within laser engraving wood grain, craftsmen unlock a realm of artistic possibility—each piece becoming a testament to both skill and nature’s silent poetry.
Common Challenges and Troubleshooting
Burning and Over-Engraving
Laser engraving wood grain can transform ordinary timber into stunning works of art, but it’s not without its challenges. One common issue is uneven burning, which often results from improper laser settings or inconsistent wood surfaces. When the laser burns too deeply, it can cause over-engraving, obscuring the natural beauty of the wood grain and creating a rough, unpolished appearance.
To troubleshoot burning and over-engraving, it’s essential to fine-tune your laser parameters—particularly laser power and speed. Lowering the power or increasing the speed can help achieve a more delicate and precise engraving that enhances the wood grain rather than overwhelming it. Sometimes, adjusting the focus or ensuring the wood surface is evenly sanded can prevent uneven burning, allowing the natural pattern to shine through vividly. Remember, patience is key—small adjustments often make all the difference in capturing the intricate beauty of the wood grain while avoiding unwanted burn marks.
For more complex projects, consider using
- test engravings
- gradually increasing laser intensity
to identify the optimal settings that preserve the wood’s natural texture and pattern without risking damage. Mastering these troubleshooting techniques opens a world of creative possibilities in laser engraving wood grain, turning raw timber into timeless keepsakes with finesse.
Uneven Engraving Results
When it comes to laser engraving wood grain, perfection often hinges on subtle nuances—tiny shifts in technique that can transform chaos into harmony. Yet, even the most skilled artisans encounter the challenge of uneven engraving results. This inconsistency can feel like a betrayal of the natural beauty you aim to highlight, revealing flaws rather than finesse.
Uneven burning is one such obstacle—an unwelcome byproduct of improper laser settings or a surface that isn’t uniformly prepared. The result? Distorted patterns and an unbalanced aesthetic that diminishes the inherent richness of the wood grain. To mitigate this, meticulous control over laser parameters becomes paramount. Adjusting laser power and speed, for example, can be the difference between a vivid, detailed engraving and a muddled mess of scorch marks.
Sometimes, the solution lies in the basics: ensuring the wood surface is evenly sanded or focusing the laser precisely. These steps may seem simple, but they hold the power to unlock the full potential of laser engraving wood grain. Patience, coupled with deliberate experimentation, allows artisans to discover the perfect balance—preserving the natural texture while avoiding the pitfalls of over-engraving. After all, the essence of laser engraving wood grain is to enhance, not obscure, its natural allure.
Dealing with Different Grain Types
One of the most common challenges in laser engraving wood grain is dealing with the natural variation in different types of wood. Each species has a unique pattern, density, and porosity, which can drastically affect the outcome. For example, dense hardwoods tend to require higher laser power, while softer woods may scorch easily if parameters aren’t carefully adjusted.
When working with various grain types, troubleshooting often involves understanding how their characteristics influence laser engagement. For softer woods, lower speed settings help prevent over-burning, while harder woods might need increased power to achieve clarity without over-engraving. Recognising these differences is key to mastering laser engraving wood grain effectively.
To optimise results, consider these steps:
- Identify the specific wood type and its natural grain pattern.
- Adjust laser settings accordingly—power, speed, and frequency—to match the material’s density.
- Test engravings on scrap pieces to refine your approach before proceeding to your final project.
Handling different grain types requires patience and a keen eye. Each wood responds differently, but understanding these nuances will elevate your laser engraving wood grain to new levels of precision and beauty. Troubleshooting is part of the process—embrace it as a pathway to mastery!
Maintenance and Post-Processing
Cleaning and Sealing Engraved Surfaces
Once your masterpiece of laser engraving wood grain is complete, the real work begins—maintenance and post-processing cleaning. Think of it as giving your artwork a spa day. Dust, soot, and tiny charred bits can cling stubbornly to the surface, dulling the intricate details and muddying the contrast. A gentle wipe with a soft cloth or specialised cleaning brush often does the trick, but for stubborn residues, a mild cleaning solution is your best friend. Remember, patience is key—rushing can smudge delicate engravings and ruin that carefully crafted depth.
Sealing your engraved surface is equally crucial to preserve the fine details and enhance durability. Applying a suitable clear sealant not only protects the laser engraving wood grain from moisture and wear but also accentuates the natural beauty of the grain pattern. For a polished finish, you might consider a spray or brush-on polyurethane or lacquer, which forms a protective barrier without obscuring the detail. If you want to deepen contrast or add a bit of flair, a coloured stain or varnish can be carefully layered afterward. The right post-processing sealing can turn a good engraving into a showstopper—lasting years and turning heads with its rich, enduring finish.
Protecting the Artwork
Once the laser has finished its artistic assault on the wood grain, the real magic—or perhaps the real maintenance—begins. Protecting your masterpiece from the daily grind involves more than just admiration; it requires diligent care to preserve that intricate laser engraving wood grain for years to come. Think of it as giving your artwork a well-deserved spa day, minus the cucumber slices on the eyes.
Begin with gentle cleaning to remove stubborn soot and tiny charred bits that threaten to dull the contrast and obscure delicate details. A soft cloth or specialised cleaning brush often does the trick, but for more persistent residues, a mild cleaning solution is your secret weapon. Patience is paramount—rushing the process risks smudging the fine lines and ruining the depth you worked so hard to achieve.
Sealing the surface is the finishing touch that transforms a good engraving into a showstopper. Applying a clear sealant, such as polyurethane or lacquer, creates a formidable barrier against moisture and wear—think of it as armour for your laser engraving wood grain. For those seeking a more dramatic effect, coloured stains or varnish can be layered carefully, deepening contrast and adding flair. Remember, a well-sealed surface not only protects but also enhances the natural beauty of the wood grain, ensuring your engraved artwork stays stunning for years to come.
Final Finishing Touches
After the intricate dance of laser engraving wood grain, the journey is far from over. The final stage—post-processing—serves as the enchanted finishing touch that transforms a mere engraved piece into a treasured artefact. To preserve the depth and clarity of your laser engraving wood grain, a delicate approach to maintenance is essential. Think of it as nurturing a rare, living sculpture, one that requires gentle attention and respect.
Begin with a soft, lint-free cloth to carefully remove any residual soot or tiny charred fragments that may have settled into the grain. For stubborn blemishes, a mild cleaning solution can act as a gentle purifier, restoring the wood’s natural luster without risking damage to the delicate engravings. Patience during this phase is key—rushing may cause smudges or disturb the finely etched details, diminishing the artwork’s intricate beauty.
Sealing the surface elevates the piece from good to extraordinary. Whether you opt for polyurethane, lacquer, or a custom-coloured varnish, these protective layers act as armour, shielding your laser engraving wood grain from moisture, scratches, and everyday wear. For those seeking dramatic visual impact, layering coloured stains or varnish can deepen contrast and highlight the natural grain patterns, accentuating the artistry.
0 Comments