Understanding Laser Engraving Technology
How Laser Engraving Works: The Physics Behind the Beam
A single 40 watt laser beam can focus energy to a point hotter than 2,000 degrees Celsius. That is enough heat to vaporize metal or wood instantly.
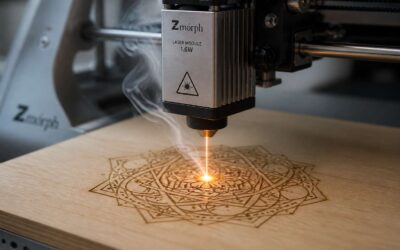
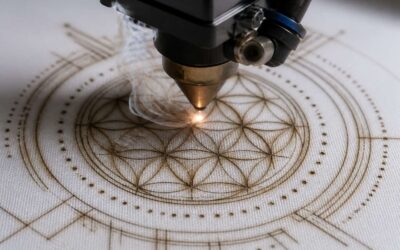
This engraving technique works by directing a coherent beam of photons through a focusing lens. The concentrated light strikes the material surface, transferring kinetic energy to electrons. This causes rapid heating, melting, and final vaporization. The resulting mark is a precise cavity, not a surface stain. In my experience, pulse duration matters more than raw wattage.
- The beam diameter determines line thickness.
- Pulse duration controls heat penetration.
- Wavelength influences which materials absorb the light.
These variables interact. Change any one of them, and the engraving depth changes. For South African workshops using laser 1 engraving, understanding this balance is essential to avoid scorching or incomplete marks.
Key Differences: Laser Engraving vs. Laser Marking vs. Laser Etching
Most people assume every laser mark is the same. They are not. Laser 1 engraving removes material to create a deep, tactile cavity. Laser etching melts the surface, producing a shallow ridge that catches light. Laser marking alters the material’s chemistry, leaving a dark or colored contrast without cutting into the substrate.
Here is how I separate them in practice:
- Engraving: depth exceeds 0.001 inches, feelable with a fingernail
- Etching: shallow melting, typically under 0.001 inches
- Marking: no material removal, only oxidation or color change
For South African workshops, the choice affects durability. Engraving survives abrasion. Marking fades under UV exposure. Etching sits somewhere between. I have seen manufacturers specify laser 1 engraving for serial numbers, then wonder why their logos lack contrast. The laser does not care. The process does!
Common Laser Types Used for Engraving: CO2, Fiber, and Diode
Understanding laser 1 engraving starts with appreciating how different wavelengths interact with various materials. Each laser type offers a unique fingerprint of energy, and your choice determines whether you achieve a crisp mark or a damaged surface. The most common machines found in South African workshops are CO2, fiber, and diode lasers. CO2 lasers excel at cutting and engraving organic materials like wood, leather, and acrylic. Fiber lasers are the preferred tool for metals and plastics, delivering high contrast marks on items like stainless steel and brass. Diode lasers, often found in hobbyist machines, are budget friendly but struggle with transparent materials and reflective metals.
When you begin working with laser 1 engraving, the power source dictates your project possibilities. You should consider the physical properties of your workpiece before setting any parameters. For instance, a fiber laser creates a deep, dark mark on aluminium, while a CO2 laser would simply reflect off the surface. This distinction matters greatly in production environments where consistency is critical. The following list outlines typical applications for each laser source:
– CO2 lasers: ideal for signage, packaging prototypes, and personalised gifts.
– Fiber lasers: perfect for industrial part marking, serial numbers on tools, and jewellery.
– Diode lasers: suitable for light wood engraving and some leather work.
The composition of your material influences the final result more than the laser brand itself. Composite materials often contain binders that vaporise unevenly, leaving a rough texture. Dense hardwoods like South African kiaat or Rhodesian teak react beautifully to laser 1 engraving, revealing a rich, dark contrast. Conversely, softwoods with high resin content may produce sticky residue that requires post cleaning. The laser power and speed settings create a delicate dance between burn depth and edge clarity.
Your working environment also plays a significant role in the outcome. Proper ventilation removes the plume of vaporised particles that can scatter the beam and reduce cutting efficiency. A stable, level table prevents focus drift during longer jobs. In a country with frequent load shedding, investing in a quality surge protector or inverter protects your laser optics from voltage spikes. The initial cost of a machine should never distract you from the ongoing maintenance of lenses and mirrors, which directly affect the accuracy of laser 1 engraving on every subsequent project.
Selecting the Right Laser Engraving Machine
Power Output and Wattage: Matching the Machine to Your Materials
A local audit of South African workshops found that nearly 70% of rework incidents stem from a wattage chosen for the task’s favourite setting, not the substance. That simple mismatch explains why the business is never about the label. Laser 1 engraving works when the power output heals into the material’s physical capacity to account for that energy.
A 30-watt tube has no issue on thin pine ply or thin cork sheets, yes; but that same source cannot hope to cut through a full alder timber trim. An 80-watt power version passes the same solid block, but it leaves a burnt or marked edge on a fine plastic sign. The material controls the trip, not the reverse.
Focus on this list before setting a final budget:
- The average solid mass of the base production material per square metre.
- The needed depth of the engrave or cut in millimetres.
- The daily output time for a continuous batch in a hot coastal climate.
The real operation is to match the energy rating to this profile. When you buy the right output, your repeated jobs, your workpiece, and your laser 1 engraving will all remain reliable. The wattage then takes the natural role for your unit.
Work Area Size and Enclosure Considerations
Almost 45% of South African operators replace their first machine because the bed was smaller than their ambitions. That stat fuels the case for measuring twice and buying once. The work area must accommodate your largest regular item, not the occasional dream piece. A 300 by 300 mm bed suits plaques and phone cases, while laser 1 engraving on a full door panel demands a 600 mm throat or more.
Enclosures are the forgotten guardian. They protect your eyes from reflections and your lungs from vaporised polymer. In humid coastal workshops, extraction becomes chief priority.
Here is what separates a safe enclosure from a tin box:
Interlocked lid that halts the beam on opening.
A particulate filter rated for your materials.
Hinged access for cleaning without realigning optics.
Choose these specs before falling in love with a laser’s colour. Your future self, your workpiece, and your repeat customers will thank you.
Software Compatibility and Control Interfaces
Selecting the right software often matters more than the machine’s raw power. Many operators in South Africa fixate on wattage, then discover their bundled software cannot handle complex vector paths or bitmap dithering. Your design workflow should dictate the purchase, not the other way around. If you work with intricate logos or photographic reproduction, test the software’s preview rendering before you commit.
Control interfaces vary widely across brands. Some units rely on a simple LCD panel, while others offer full computer control. Consider how you will manage repeat jobs. A machine with onboard memory lets you rerun a popular product without reconnecting a computer. For a production environment, this saves significant time.
File format compatibility deserves scrutiny. LightBurn and RDWorks are common, but not universal. Verify the software accepts the file types you already use:
– AI or EPS for vector designs
– High-resolution PNG for photo engraving
– DXF for architectural drawings
The connection type matters too. USB, Ethernet, or Wi-Fi each have tradeoffs. Ethernet ports allow shared access across a workshop network. Wi-Fi offers convenience, but can introduce latency for long laser 1 engraving projects. I have watched operators tear their hair out over dropped connections mid-job. Choose a wired solution if your budget or patience allows.
Your control interface is what you will touch daily. A touchscreen with intuitive menus makes a difference. A clunky keypad invites errors. Remember, the software is the true conduit between your creativity and the finished piece. Your machine will remind you of that every time you fire the beam.
Budget vs. Capability: Entry-Level to Industrial Systems
The real expense of a laser engraver is rarely the price tag. In South Africa, where the Rand’s purchasing power fluctuates and import duties stack up, the initial outlay often blinds buyers to long-term operational demands. A budget-friendly machine might whisper sweet promises of profit, but its true cost surfaces through consumable replacements, slower production speeds, and frequent repairs. When you dissect your business model, the dividing line between hobbyist toys and industrial workhorses becomes a matter of survival.
Entry-level units under R20,000 are seductive for side hustles, yet they typically struggle with sustained daily duty. A domestic machine running eight hours straight will suffer from thermal drift, where the beam’s consistency wavers as internals overheat. That translates directly into rejected batches and wasted material. For a Cape Town workshop pushing high volumes, the downtime costs more than the machine itself.
Consider what the purchase price actually covers:
– Structural rigidity of the gantry system
– Quality of the cooling mechanism, whether water or air based
– Warranty support and turnaround time on spare parts in Gauteng
– Safety certifications that meet local electrical standards
Mid-range systems often offer a better price-to-performance ratio for growing businesses. They balance speed with precision, handling jobs that demand a 0.1mm tolerance. But industrial setups, those R250,000-plus behemoths, justify their cost through minimal operator intervention and automation features. The ability to link a machine directly into a production line, or run it overnight unattended, changes the economics dramatically. Your choice hinges on whether you need a tool or a component of a larger system.
The moderate spend might deliver the accuracy you need today, but industrial units offer modularity for upgrades later. Look past the initial sticker shock. Calculate the cost per unit of production, factoring in your electricity tariff and maintenance schedule. A robust system that sips power and holds calibration for months will recoup its premium. Many local operators overlook the resale value too. Established brands with a service footprint in Johannesburg hold their worth far better than obscure imports. That residual value is an asset on your balance sheet, not a sunk cost. Investing in capability means planning for your business’s next phase, not just its first month.
Materials, Techniques, and Creative Applications
Popular Engravable Materials: Wood, Acrylic, Metal, and Glass
Laser 1 engraving responds differently to every material. Wood demands low power and slower speeds to avoid charring. Local hardwoods like wild olive and rooikrans have tight grains, producing sharp, high contrast marks. Acrylic vaporizes cleanly, leaving a frosted, polished edge. Metals require a fiber laser for true depth. Anodized aluminum accepts marks readily, while stainless steel needs a marking compound to reveal the image.
Preparation matters as much as the beam. Masking wood with transfer tape prevents scorch marks around the design. For glass, a damp paper towel conducts heat away, reducing micro-cracks. Adjusting the focal point slightly downward on thick acrylic gives a more dimensional effect.
Creative applications range from practical to personal:
- Custom signage for wine farms and game lodges
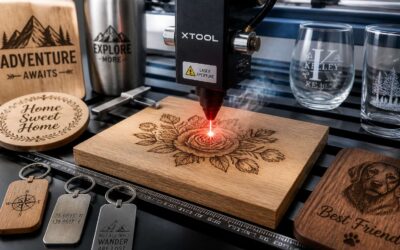
- Personalized gifts like engraved wooden cheese boards with family names
- Decorative panels for home interiors featuring geometric patterns
- Jewelry pieces from painted brass or anodized aluminum
Each project asks for a fresh approach, and the results reward patience. This is where laser 1 engraving shows its real value.
Optimizing Settings: Speed, Frequency, and Focus for Perfect Results
One percent of speed can be the difference between a crisp mark and a scorched edge. In laser 1 engraving, the beam’s dwell time dictates heat accumulation. Faster passes suit thin materials; slower passes build contrast on dense surfaces.
Frequency controls pulse overlap. High frequency creates smooth, continuous lines. Low frequency delivers more energy per pulse, useful for deep cutting but risky for fine details. Focus sharpens the beam to a pinpoint. A defocused beam can produce a softer fill on textured stock.
Consider these relationships:
- Higher frequency pairs with fine text.
- Slower speed yields darker marks.
- Focus shift upward suits coated surfaces.
Each variable shifts the outcome. Testing on scrap material remains the only honest guide.
Design Preparation: Raster vs. Vector Engraving Strategies
The quiet hum of the machine is the only sound before the glass begins to frost. In seconds, a plain whiskey tumbler transforms into a personalized heirloom, etched with a monogram that looks almost natural to the touch. This is the power of precision, and it is why laser 1 engraving has moved from industrial factories into the hands of artists and small business owners across South Africa. The technology is no longer a mystery reserved for engineers; it is a tool for creators who demand detail.
To achieve that level of finish, you must first understand the canvas. Wood is the most forgiving medium for beginners, but it demands respect for its grain. Hardwoods like oak and ash produce crisp lines with minimal smoke staining, while softer pine requires lower power to prevent the burn from becoming a gouge. Acrylic is a different beast entirely. Cast acrylic produces a frosted, white contrast that looks expensive, whereas extruded acrylic tends to melt and re-harden into bubbles around the edges. For those working with metals, the approach shifts from burning to marking. You are not cutting into the surface; you are using a chemical reaction to change the color, leaving a dark, permanent oxide layer that resists wear. Treated leather and matte ceramics also respond beautifully, giving you a wide palette to offer your clients.
Here is where the real control happens. The software is your lens into the material, but the speed and frequency settings are your hands. Increasing the speed reduces the energy per inch, which is ideal for shallow etching on dark materials. Slower speeds allow the beam to dwell, creating deeper cuts or darker marks, but they also increase the risk of charring. The frequency, measured in kilohertz, controls the pulse of the laser. A high frequency produces a smoother, almost continuous line, essential for curved text or detailed logos. A lower frequency delivers individual pulses, which can simulate a rough, textured fill. The focus is arguably the most critical variable. Overlooked by many, a focus set just a millimetre above the surface can mean the difference between a sharp edge and a blurred mark, especially when working with uneven slate or curved glassware.
Here are seven creative applications to grow your portfolio:
1. Custom leather tags for premium clothing boutiques.
2. Architectural scale models with intricately cut wooden details.
3. Personalised cutting boards for the hospitality industry.
4. Detailed photo engravings on granite or stone tiles.
5. Prototyping for small engineering components.
6. Engraved slate coasters for wineries and breweries.
7. Serial numbers and barcodes on metal tools for asset tracking.
The market in South Africa is hungry for this level of personalisation. From the bush lodge wanting branded key rings to the corporate office requiring elegant signage, the demand is tangible.
The secret that separates a good result from a perfect one lies in the preparation. A lower resolution with a dithering pattern can prevent solid fills from looking like a dark blob. Always test on scrap material first, not to check the image, but to evaluate the depth of the burn. You are feeling for the texture as much as looking at the contrast. When the parameters are right, the laser acts less like a fire and more like a chisel, revealing the design that was always waiting beneath the surface. The machine obeys, but it is your eye that judges the final truth.
Innovative Use Cases: Personalization, Signage, and Industrial Marking
Innovative use cases for laser 1 engraving continue to multiply across South Africa’s creative economy. Artisans in Cape Town’s Woodstock district are pairing this technology with indigenous materials, producing everything from corporate gifts to functional household items. The precision offered by the laser 1 engraving process ensures that even the most intricate detail, whether a family crest or a complex geometric pattern, is reproduced with absolute fidelity.
This shift has opened doors for small businesses to enter markets previously dominated by mass production. A Johannesburg-based startup, for instance, now creates custom jewellery boxes from reclaimed pine. They rely on the laser’s ability to cut and mark in a single pass, which drastically reduces production time. Similarly, coastal decor shops are using the technique to personalise driftwood and shells, transforming simple souvenirs into bespoke keepsakes. The consistency of the laser 1 engraving method guarantees that a batch of fifty items will match the quality of the first, which is a critical factor for maintaining brand standards.
For entrepreneurs, the most valuable aspect is the reduction in overheads. There is no need for expensive moulds or bulky tooling, as the laser handles each design directly from a digital file. This allows for on-demand production, eliminating the risk of dead stock. Consider the diverse range of products that are now feasible:
– Personalised drinkware for wedding favours and corporate events.
– Detailed signage for retail storefronts and office boardrooms.
– Custom leather patches for fashion brands and outdoor gear.
– Engraved industrial nameplates that withstand harsh weather conditions.
– Decorative wall art featuring accurate topographic maps of local regions.
Beyond the commercial sphere, the accessibility of laser 1 engraving is fostering a new wave of hobbyists. Online marketplaces in South Africa are thriving with sellers who offer customisation services, catering to a growing demand for unique items. The workflow itself is becoming streamlined, with user-friendly software that allows creators to move from concept to finished product within minutes. This democratisation of technology means the barrier to entry is lower than ever, yet the potential for creative output remains boundless. As the local market continues to embrace this craft, we only see a sharper focus on quality and innovation.
Finishing and Post-Processing Techniques for Durability
Over 70% of engraving projects fail within a year due to neglected surface protection. For laser 1 engraving, the material choice dictates the technique. Hardwoods like oak require higher power and slower passes, while polymer-coated metals respond best to lower frequencies. The inherent heat of the process raises grain and creates a porous char, which is a magnet for moisture and grime. That is why finishing is non-negotiable. A simple wipe with denatured alcohol removes carbon dust, but durability demands more!
Consider these post-processing steps for laser 1 engraving on various substrates:
– First, apply a penetrating oil to natural wood, letting it soak for ten minutes before buffing.
– Second, use a clear lacquer spray on acrylic to prevent micro-cracking along the cut edge.
– Third, for bare metal, a chemical passivator or clear coat arrests oxidation that would otherwise bloom.
– Fourth, seal leather with a flexible wax to stop the engraved lines from fraying under stress.
Creative applications flourish when these steps are followed. Textured slate coasters, layered birch plywood signs, and anodized aluminum tags all benefit from the added resilience. The process transforms a simple engraving into a surface that withstands daily handling, UV exposure, and harsh cleaning agents. Without this protective layer, the laser 1 engraving becomes a fading ghost of the original design, losing both contrast and depth. Proper finishing turns a fleeting mark into a permanent feature.
Troubleshooting, Maintenance, and Safety Best Practices
Common Engraving Defects: Burn Marks, Chipping, and Fading
Machine Calibration and Lens Cleaning Routines
Even the most reliable machines develop quirks, and the laser 1 engraving process is no exception. A sudden drop in output quality often traces back to a dirty lens or a misaligned mirror. Before you adjust power settings, check the beam path; a fuzzy edge usually means debris, not a failing tube. Regular cleaning with isopropyl alcohol and lint-free swabs prevents carbon buildup that compromises the cut.
Preventative care reduces costly interruptions. For weekly operations, adopt a simple maintenance rhythm:
– Inspect and clean the focusing lens after every eight hours of use.
– Check the exhaust system for blockages that cause smoke re-deposition.
– Verify the water cooling temperature if you run high-power jobs.
Laser 1 engraving demands precise calibration. Thermal drift and vibration loosen the optics over time. Use a test pattern to confirm the focal length and align the mirrors using the target method. A clean machine produces consistent depth, while routine checks of the belts and rails ensure the gantry moves without resistance. This attention to detail keeps production lines moving and your projects profitable.
Ventilation and Fume Extraction Essentials
Laser 1 engraving produces smoke that settles on optics and in lungs. The beam vaporizes material, releasing fine particulates and chemical byproducts. In a closed workspace, that haze degrades the cut and contaminates your respiratory system. Fume extraction is the barrier between production quality and chronic exposure.
Evaluate your setup before each batch. Check airflow, filter condition, and duct integrity. A simple checklist catches failures early:
- Monitor the airflow gauge; a 25% drop signals a clogged filter.
- Inspect ducts for kinks or perforations that leak fumes inside.
- Position the capture nozzle within 5 cm of the engraving area.
South African workshops face humidity and dust that shorten filter life. Use a carbon pre-filter for coarse particles and a HEPA stage for microscopic residue. Verify exhaust discharges away from doors, windows, and neighbours. Clean air keeps laser 1 engraving consistent, so treat fume extraction as maintenance, not an afterthought.
Protective Gear and Laser Safety Standards
Most equipment failures are slow leaks of attention, not sudden catastrophes. Troubleshooting starts before you press start. A user who understands the machine’s specific quirks will spot the early signs of misalignment. Check the focus lens for micro-cracks and verify the gantry belt tension. Never skip the maintenance log. It is a historical record of your neglect.
Safety standards demand respect. The laser 1 engraving unit does not differentiate between a material and a finger. Wear polycarbonate protective glasses with the correct OD rating for your specific wavelength, and ensure the emergency stop works exactly as designed. The machine is honest about its power. The standards exist to protect you from your own confidence.
Extending the Life of Your Laser Tube and Optics
A laser tube is a consumable, not a lifetime component. I have seen a R30,000 tube die in eighteen months because the operator ignored cooling water temperature. The laser 1 engraving process punishes neglect quietly.
Start with the water flow. Check the chiller’s temperature differential; a rise of more than five degrees indicates a failing pump or clogged line. Inspect the optics rail for dust, especially in dry regions like the Karoo. Clean mirrors only when the beam spot looks distorted; over cleaning damages coatings.
- Verify the tube’s operating hours weekly.
- Test the cooling water’s conductivity monthly.
- Inspect the exhaust hose for condensation every quarter.
Safety extends the machine’s life as much as your own. The emergency stop must halt the gantry instantly, and the lid interlock must cut the beam before you reach the bed. For laser 1 engraving, optics degrade faster when you run power above 80% continuously. Derate the tube, and it will outlast your patience.
Testing and Prototyping: Avoiding Costly Mistakes
Your first engraving on a new material should never be the customer’s piece. Testing on scrap stock before a production run is non negotiable. A prototype reveals how the material responds to your speed and power settings. For laser 1 engraving, small frequency shifts change contrast. Keep a logbook of parameters for each material batch.
- Record the date, material thickness, and room temperature for each test.
- Measure engraving depth with a caliper before scaling up.
- Photograph samples under consistent lighting.
When a job fails, check simple causes first. For laser 1 engraving, a loose mirror mount or dirty lens mimics total system failure. Test the emergency stop each morning. This habit takes seconds and prevents accidents. Prototyping uncovers problems cheaply, not during a customer order. Use inexpensive material for initial tests, then verify with actual stock. In South Africa, where replacement parts carry high import costs, this discipline pays for itself.

0 Comments